
Fall Collage
How to Make A Fall Collage
The chill is in the air and the leaves are changing. Celebrate fall with an artistic masterpiece, combining synthetic and natural elements to create an assemble work of art that is truly unique to the season.
Supplies Needed:
-
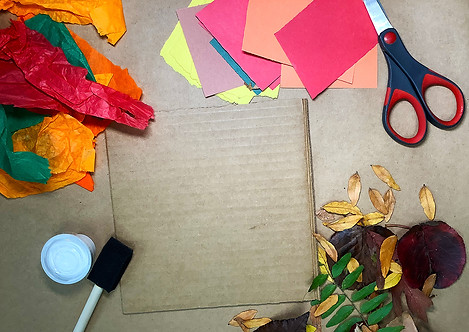
Colored Papers
-
Assemblage Board
-
Glue & Brush
-
Pencil or Marker
-
Scissors
-
Bag or Tray for Leaf Collecting
-
A Chapter Book

Step-by-Step Instructions
Step 1:
Using your Leaf Identification Worksheet, explore the world around you. Be sure to get your parents’ permission of course. Walk down the driveway, up the street or to a nearby park and see if you can find some of the leaves on the sheet. Can you identify which leaves come from which tree? Note what colors they are on your work sheet. Place all your leaves in a bag for now. When you get home, lay them inside a chapter book. This will flatten them and make them easier to work with later.


Step 2:
Create a work space on a table where you can spread out all your materials.
Step 3:
Start by gluing colored papers to your board. You can add things you have at home to your board also such as words or pictures from magazines that remind you of fall. Using your worksheet, you can cut out the leaves and use them as tracers to make more paper leaves in a variety of colors.

Step 4:
Add in your flattened leaves by gluing them down and coating them with a layer of glue on top.

Step 5:
Finish your collage by coating the entire surface with a thin layer of glue. This glue dries clear and shiny. It will take several hours for it to dry completely.

Step 6:
Clean up your work space, wash your brush out for another time and enjoy your fall foliage masterpiece!

Interested in Learning more about why leaves change color? Check out this video from Scientific American!